
Users and Roles
Invite somebody into Worklink, give them a role, and restrict an administrator to the offices they actually run.
An employee record says somebody works here. A user says somebody can sign in. This screen is the second of those, split into Users, who has access, and Roles, what access means.
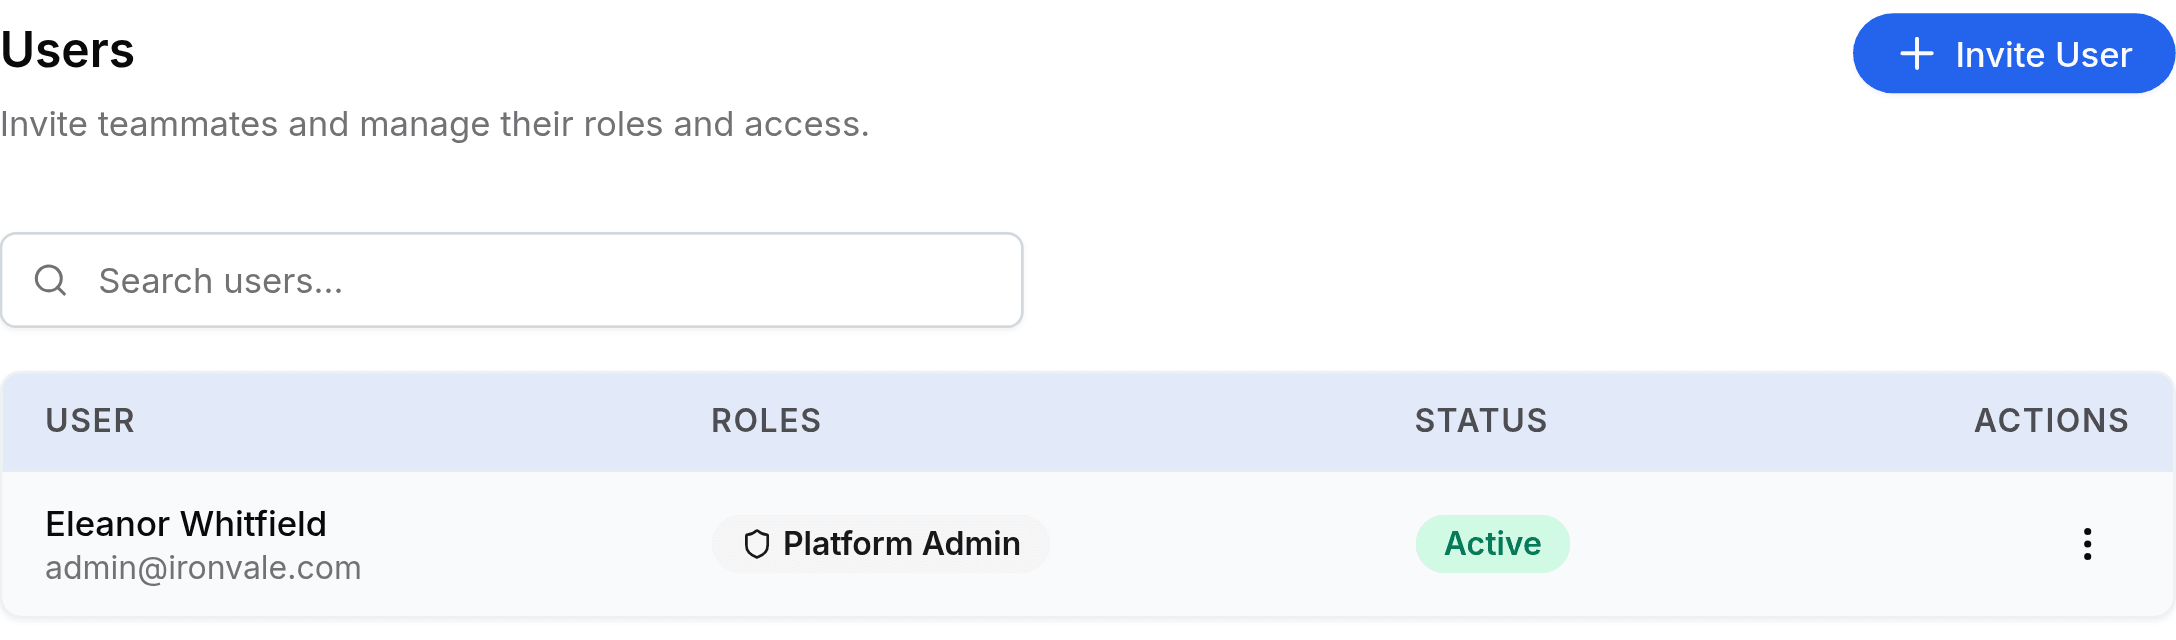
Invite somebody
Go to Worklink Settings > Users & Roles, then open the Users tab.
Select Invite User to open Invite Team Member.
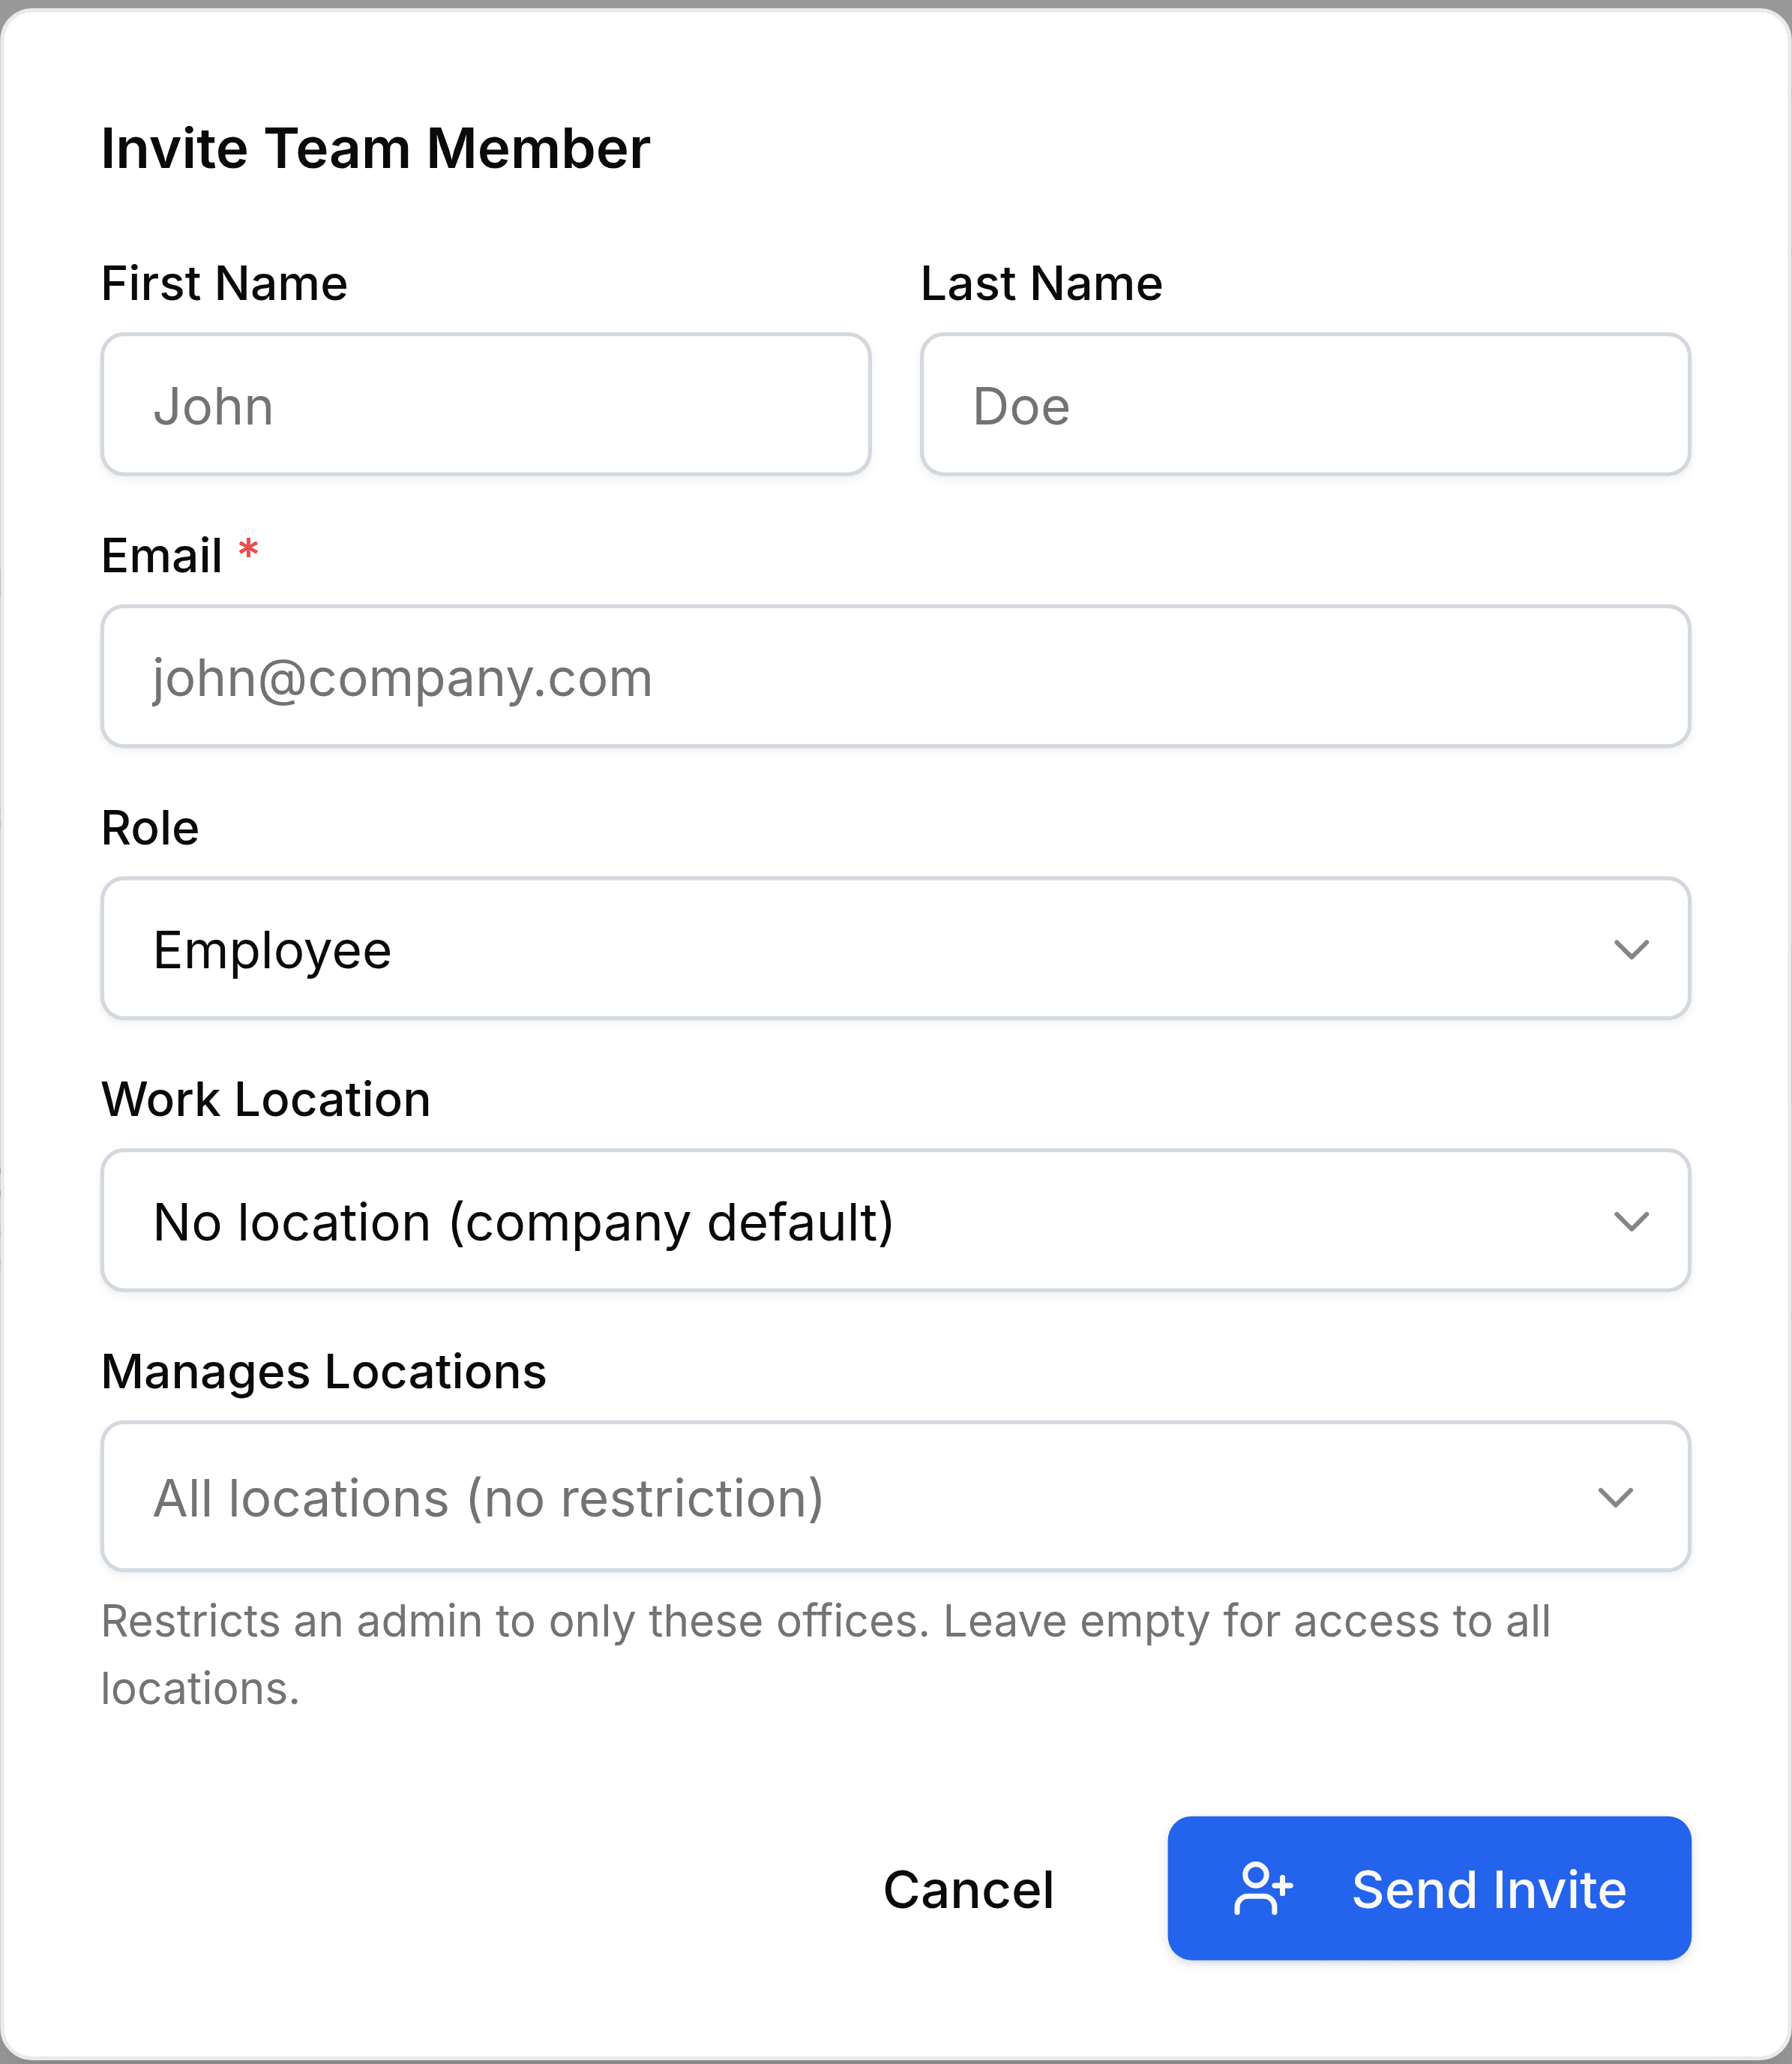
Enter their Email. It is the only required field, and it is where the invitation goes.
Add a First Name and Last Name, then choose a Role.
Set a Work Location if they belong to one office, or leave it on No location (company default).
Select Send Invite.
Manages Locations, and why it is separate
Work Location is where somebody works. Manages Locations, just below it, is which offices they administer, and it appears on the invitation and on Change Role alike.
- Left emptythe default
- No restriction. An administrator with this set sees and manages every office.
- One or more officesa restriction
- Narrows an administrator to those offices only. Use it for a regional HR manager who should not be editing another region's people.
What a role is, and what it covers
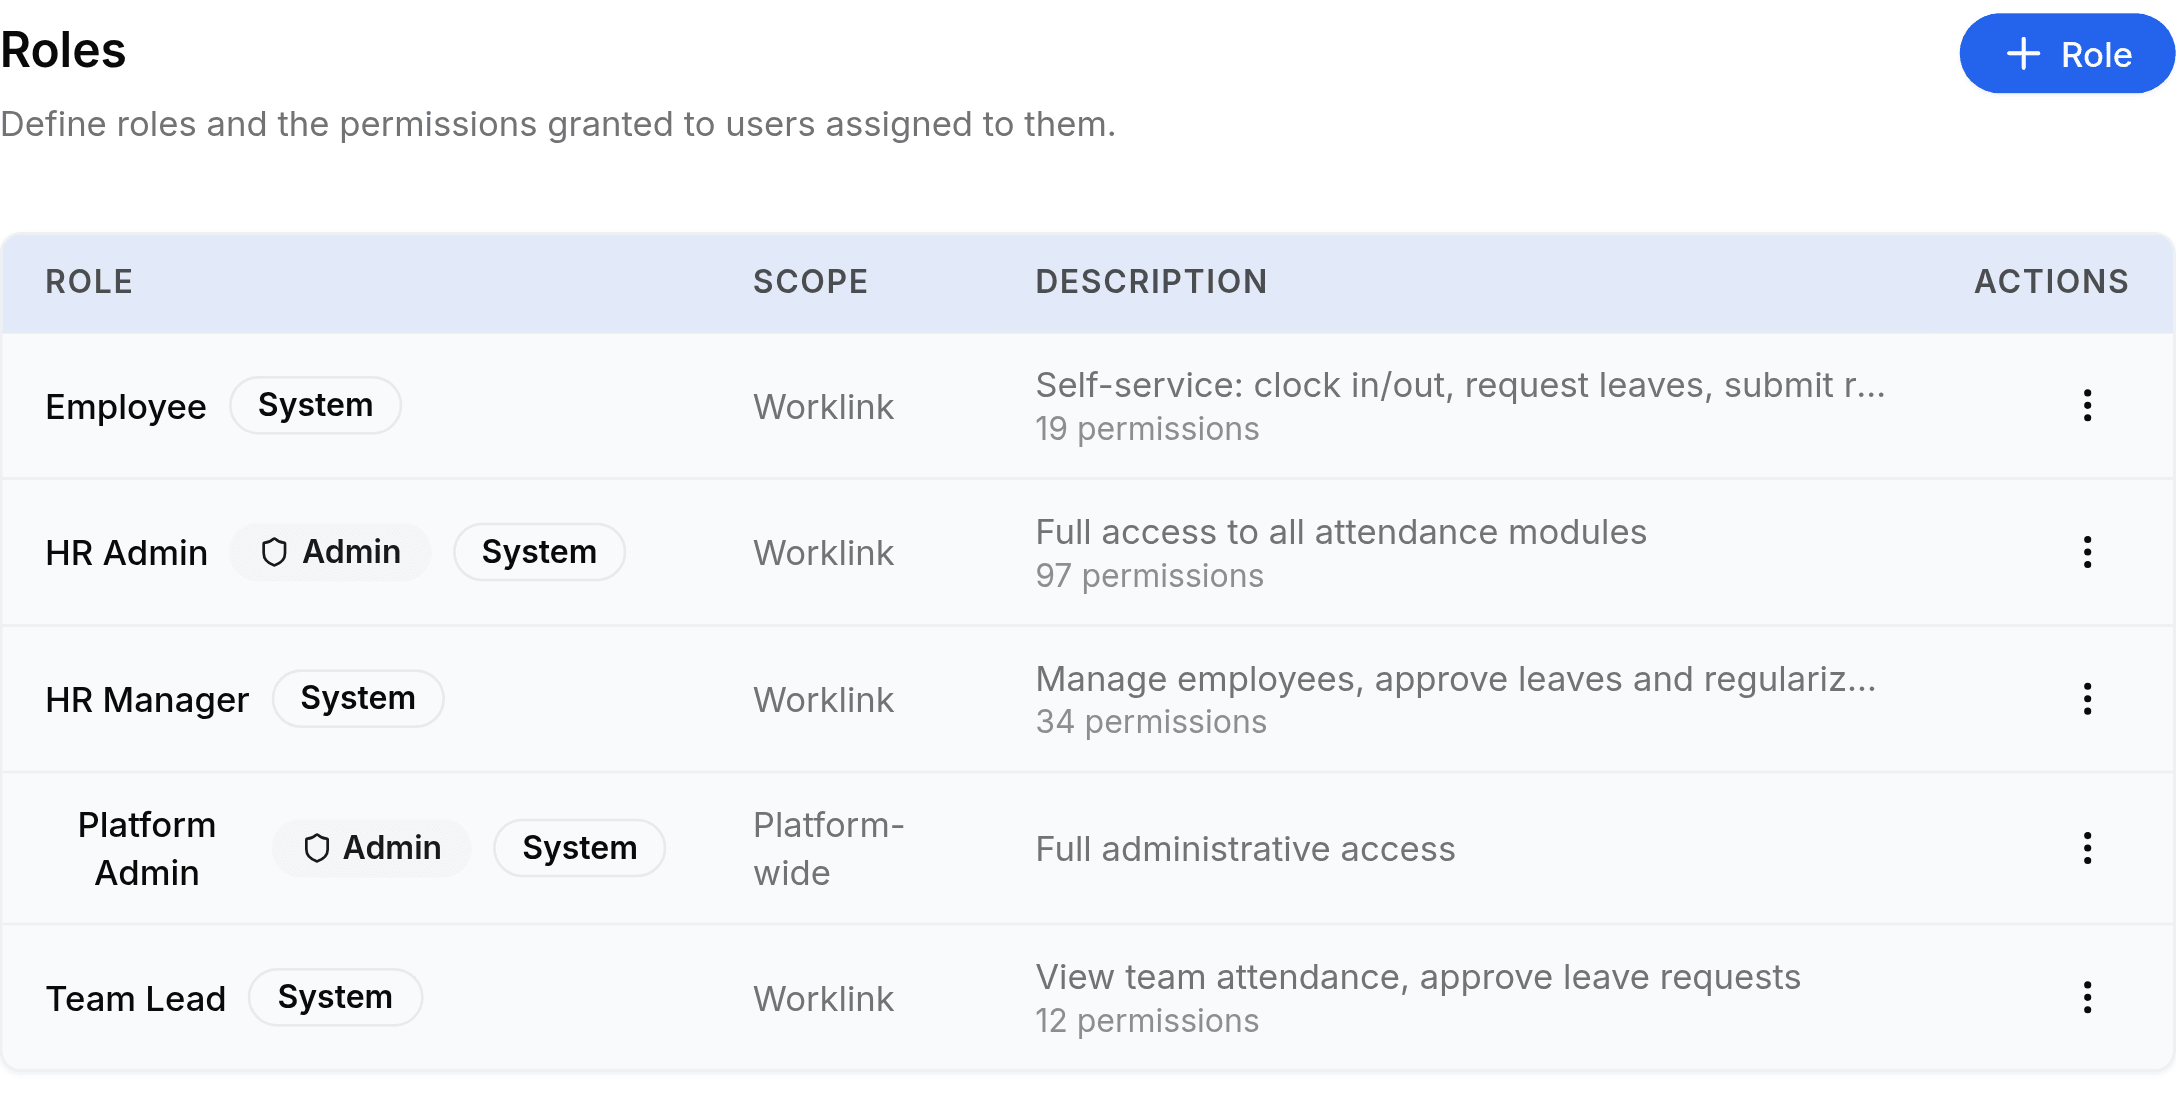
Adding one opens New Role, which asks for a Role Name, a Description of what the role can do, and then the permissions themselves, granted per module rather than as a single switch. Back to Roles returns to the list.
Changing somebody later
The row menu on the Users tab holds one action, Change Role. It swaps the role and, where the user has an employee profile, adjusts the offices they manage at the same time. A role's own menu, on the Roles tab, offers Edit and Delete.