Create a custom role
Build a role from exactly the permissions a job needs, when none of the four default roles fits. Edit or delete it later.
The default roles are broad on purpose. When a job sits between two of them, such as an auditor who should read everything, see the history and change nothing, build a role that fits it exactly. A custom role belongs to the team folder it's made in.
Create the role
Open the team folder, select Manage, then the Roles tab.
Under Custom Roles, select New Role.
Enter a name that describes the job, then select each permission the role should include. View files is ticked to start with.
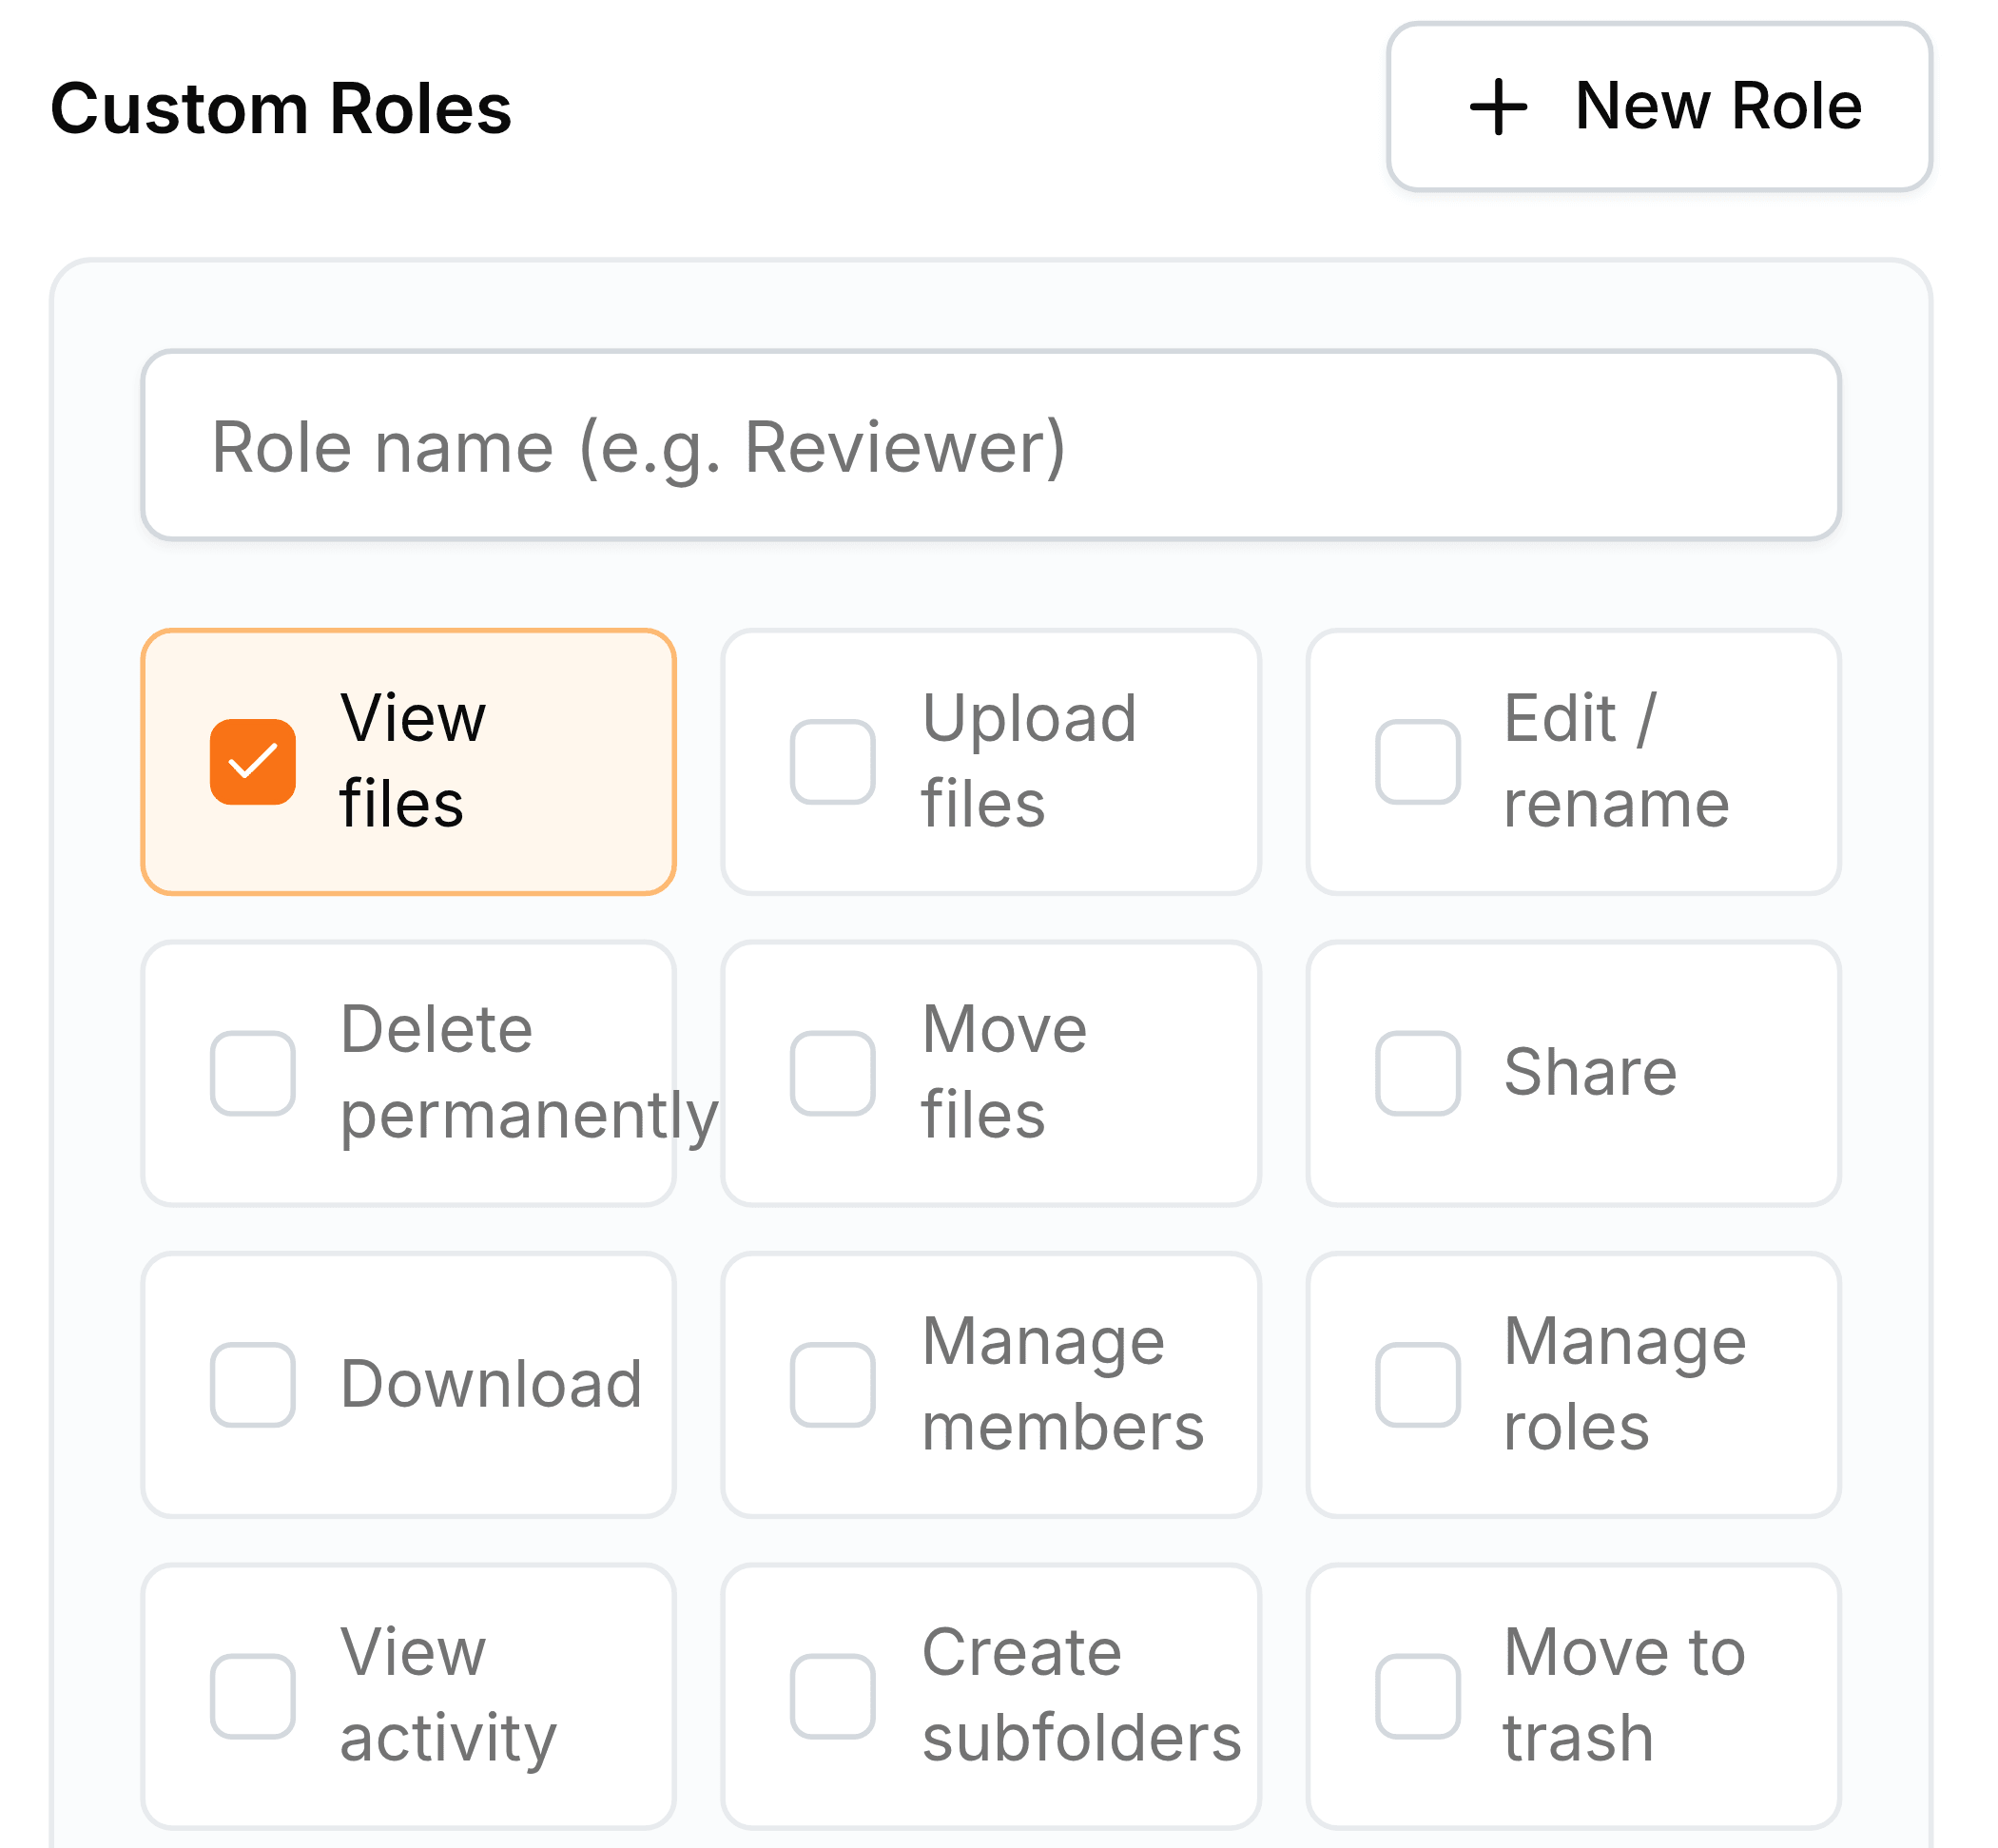
Select Create Role. It joins the list under Custom Roles, and appears in every member's role list in this folder.
Edit or delete a custom role
Each custom role's card has a pencil and a bin. The pencil reopens the same form so you can rename the role or change its permissions; select Save and every member holding it is updated at once.